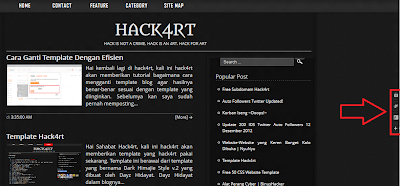
Hello kawan blogwalkers, ketemu lagi dengan saya Captain-kid
iseng-iseng liat blog om-dayz.blogspot.com
Di lihat-lihat ternyata ada widget yang keren nih gan. Social button yang dibuat om-dayz emang keren gan, blognya aja simple dan sangat ringan.
Yaudah langsung aja ke tutorial cara membuat social button ala om-dayz, Cekidot :
1. Buka Template > Edit HTML > Centang Expand Template Widget
2. Cari kode ]]></b:skin>
3. Lalu Pastekan kode dibawah tepat diatas kode ]]></b:skin>
4. Lalu cari tag </body>/* social button */ .staticbar {position: fixed;right: 0;top: 35%;width: 25px;animation:static-bar .8s;-moz-animation:static-bar .8s; -webkit-animation:static-bar .8s;} .staticbar:hover {z-index: 1000;} .rt-social-buttons a, .loginbtn {background: none repeat scroll 0 0 rgb(34, 34, 34);background-repeat: no-repeat;display: block;height: 20px;margin-bottom: 3px;padding: 4px 0 4px 4px;right: 0px;width: 140px;position: relative;-moz-border-radius: 3px 0px 0px 3px;-webkit-border-radius: 3px 0px 0px 3px;-khtml-border-radius: 3px 0px 0px 3px;border-radius: 3px 0px 0px 3px;background-position: 4px 4px;-webkit-transition: all 0.3s ease;-moz-transition: all 0.3s ease;-o-transition: all 0.3s ease;transition: all 0.3s ease;border:1px solid rgb(51, 51, 51)} .rt-social-buttons span, .loginbtn span {background-repeat: no-repeat;color: #FFFFFF;display: block;font-size: 10px;height: 18px;letter-spacing: -1px;line-height: 1.9em;padding-left: 10px;text-transform: uppercase;text-shadow:0px 1px 1px rgba(0, 0, 0, 0.2);} .rt-social-buttons a:hover, .loginbtn:hover {background: none repeat scroll 0 0 rgb(150, 0, 0);border:1px solid rgb(70, 0, 0); right: 119px;} .rt-social-buttons a#rt-buzz-btn span {background-image: url(https://blogger.googleusercontent.com/img/b/R29vZ2xl/AVvXsEgoVaL3n2jAgcYdbiCRv7H-9XBvd0wm67J8OtwqczzmiL630rwsN4gMqQ2NuBxoT0mPgGI6A70j-S3Jo9bxA329VxjoeDIhn2neHPUPlBKzSYiEujAykRJvOWnDygVrTvjdexYDU4PLHX8/s1600/socialsprite.png);background-position:-2px -68px;} .rt-social-buttons a#rt-twitter-btn span {background-image: url(https://blogger.googleusercontent.com/img/b/R29vZ2xl/AVvXsEgoVaL3n2jAgcYdbiCRv7H-9XBvd0wm67J8OtwqczzmiL630rwsN4gMqQ2NuBxoT0mPgGI6A70j-S3Jo9bxA329VxjoeDIhn2neHPUPlBKzSYiEujAykRJvOWnDygVrTvjdexYDU4PLHX8/s1600/socialsprite.png);background-position:-2px -24px;} .rt-social-buttons a#rt-facebook-btn span {background-image: url(https://blogger.googleusercontent.com/img/b/R29vZ2xl/AVvXsEgoVaL3n2jAgcYdbiCRv7H-9XBvd0wm67J8OtwqczzmiL630rwsN4gMqQ2NuBxoT0mPgGI6A70j-S3Jo9bxA329VxjoeDIhn2neHPUPlBKzSYiEujAykRJvOWnDygVrTvjdexYDU4PLHX8/s1600/socialsprite.png);background-position:-2px -46px;} .rt-social-buttons a#rt-rss-btn span {background-image: url(https://blogger.googleusercontent.com/img/b/R29vZ2xl/AVvXsEgoVaL3n2jAgcYdbiCRv7H-9XBvd0wm67J8OtwqczzmiL630rwsN4gMqQ2NuBxoT0mPgGI6A70j-S3Jo9bxA329VxjoeDIhn2neHPUPlBKzSYiEujAykRJvOWnDygVrTvjdexYDU4PLHX8/s1600/socialsprite.png);background-position:-2px -89px;} a.loginbtn span {background-image: url(https://blogger.googleusercontent.com/img/b/R29vZ2xl/AVvXsEgoVaL3n2jAgcYdbiCRv7H-9XBvd0wm67J8OtwqczzmiL630rwsN4gMqQ2NuBxoT0mPgGI6A70j-S3Jo9bxA329VxjoeDIhn2neHPUPlBKzSYiEujAykRJvOWnDygVrTvjdexYDU4PLHX8/s1600/socialsprite.png);background-position:-2px 0px;} @keyframes static-bar{0% {right:-25px;} 100% {right:0px;}} @-moz-keyframes static-bar{0% {right:-25px;} 100% {right:0px;}} @-webkit-keyframes static-bar{0% {right:-25px;} 100% {right:0px;}}
5. Paste kan kode dibawah tepat diatas kode </body>
<div class='staticbar'>
<div class='login'>
<div id='rt-login-button'>
<a class='loginbtn buttontext' href='http://blogger.com' rel='nofollow' target='_blank' title='Login Blogger'>
<span class='desc'>Blogger Login</span></a>
</div>
<div class='clear'/>
</div>
<div class='rt-social-buttons'>
<a class='lightbox' data-options='{"width":420, "height":405, "iframe": true}' href='http://twitter.com/USERNAMEANDA' id='rt-twitter-btn' rel='nofollow' title='Twitter Hack4rt'>
<span>Follow Me On Twitter</span></a>
<a class='lightbox' data-options='{"width":300, "height":430, "iframe": true}' href='http://facebook.com/USERNAMEANDA' id='rt-facebook-btn' rel='nofollow' title='Facebook Hack4rt'>
<span> Facebook Fanspage</span></a>
<a href='https://gplus.to/USERNAMEANDA' id='rt-buzz-btn' rel='nofollow' target='_blank' title='Google Plus Hack4rt'>
<span>Circle Me On Google Plus</span></a>
</div>
</div>
<script src='http://ganteng-project.googlecode.com/svn/trunk/om-dayz/panelticon.js' type='text/javascript'/>
6. Ganti Tulisan "USERNAMEANDA" dengan username kalian.
Itulah sekilas Tutorial Blogger mengenai Cara membuat social button. Semoga bermanfaat. Kekurangan saya mohon maaf, yang baik silakan diambil yang buruk mohon diperbaiki, karena sempurna hanya milik allah SWT yang maha kuasa dan juga lagu milik andra and the backbone. Trimakasih....! Captain-kid


0 komentar
Posting Komentar